Everyone loves home-made cards and gifts because greetings, invitations and messages couldn’t be more personal! A very simple way to create beautiful cards and gift tags is the fingerprint method. Whether children, parents, grandmas or grandpas – this creative design method is fun for the whole family!
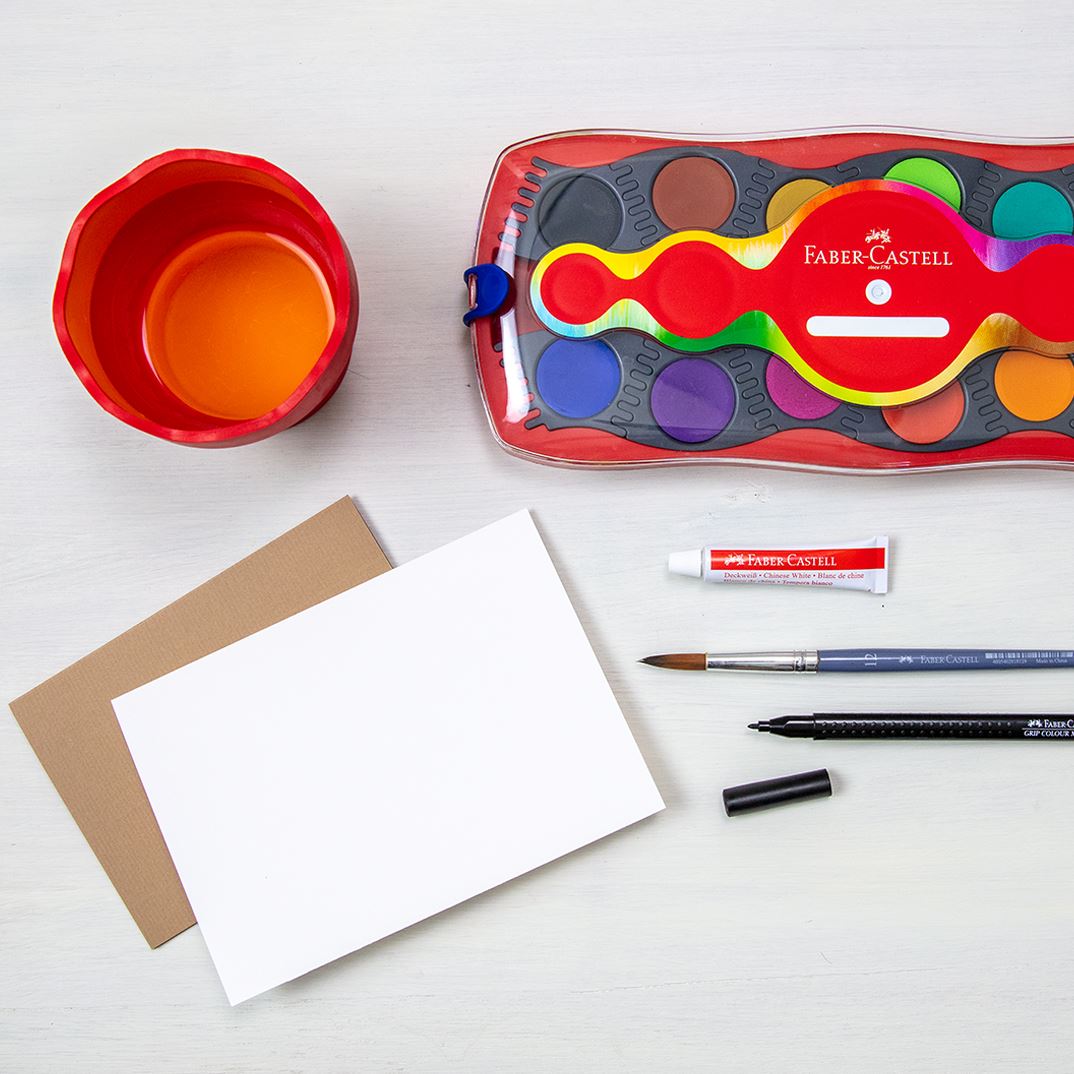
All you really need are your fingers, a Clic&Go water cup, a paintbrush and a paint box to make really cool cards and gift tags for Christmas, Mother’s Day, birthdays or Easter. Use a felt-tip pen or a colour pencil to write on your card. Use a slightly firmer paper that doesn’t curl so quickly. Watercolour paper is very suitable for this. You can also use ready-made cards. In this case, make sure that the colour you use is not too watery, but more on the dry side. And make sure you let it dry completely before you paint over it with other colours.
Fingerprints
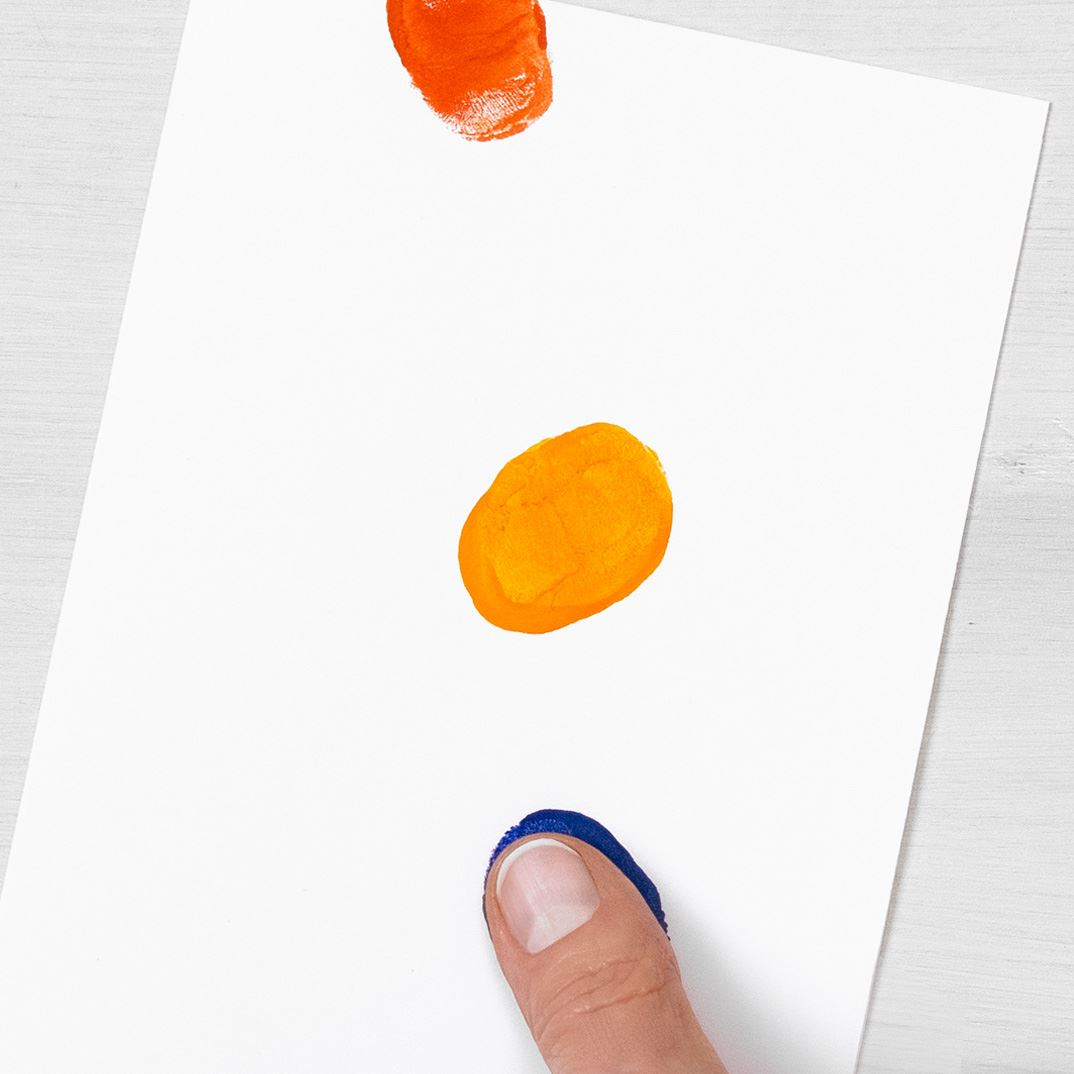
To estimate the size of the prints your fingertips will make, it is best to test the prints on a separate sheet using a bright colour. Try rolling your finger to each side (left and right), as this will increase the size of the print. When you start designing your card, your test prints will give you a better idea of which finger you can use for which print size.
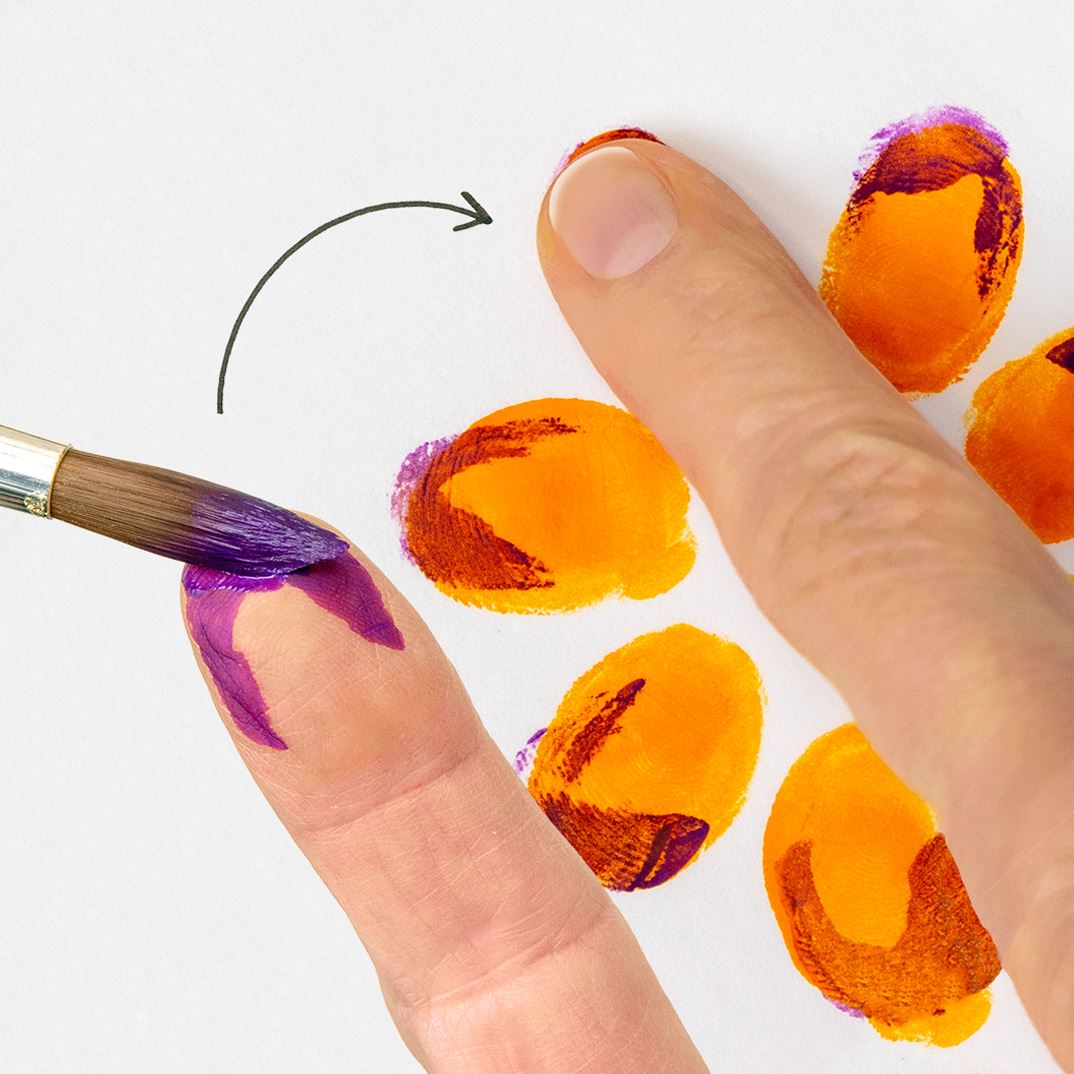
Two-colour fingerprints
Try two or more colour fingerprints. To do this, first print one colour, let the colour dry and then put a second colour over it. Or you can use the whole of your fingertip and then immediately paint another colour on your fingertip with a brush. Colours which only partially overlap are also very attractive.
Birthday Card
Step 1
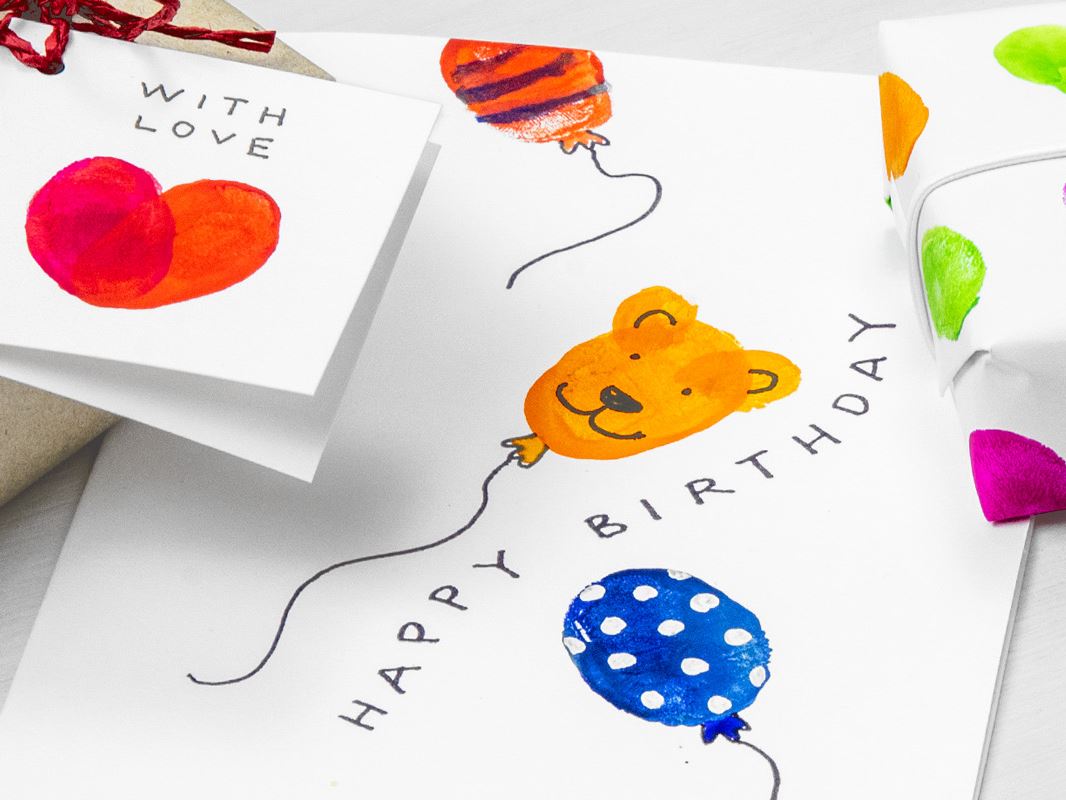
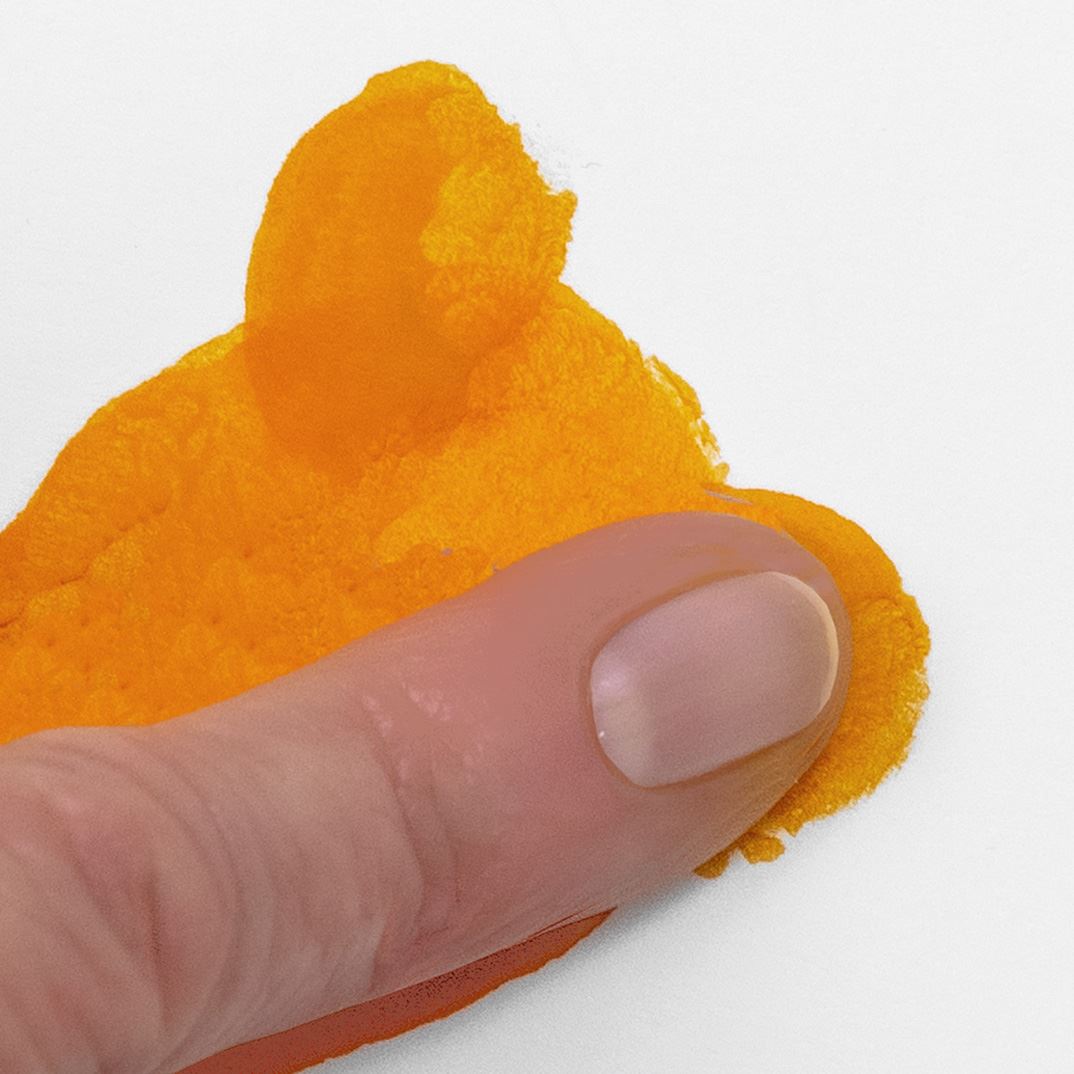
For this fun birthday card you can print balloons in all possible sizes. Use your thumb to make three prints in different colours on one card. It’s also effective to have one print disappearing over the edge of the card. Make sure you put a piece of paper under the card so that the table doesn’t get dirty.
Step 2
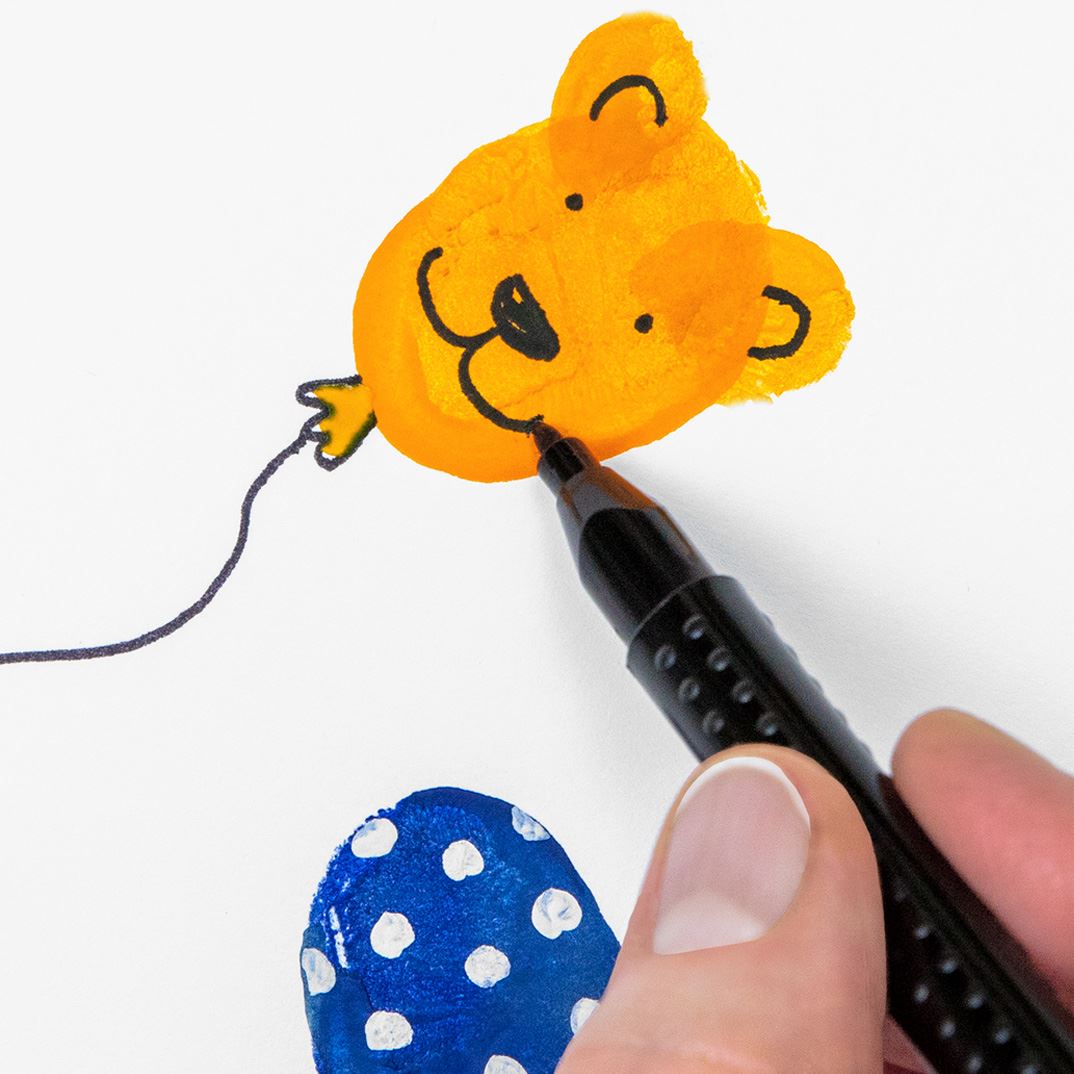
To make a bear’s head out of the middle yellow balloon, paint your little finger yellow.
Step 3
One after the other, put two yellow fingerprints as ears on the balloon.
Step 4
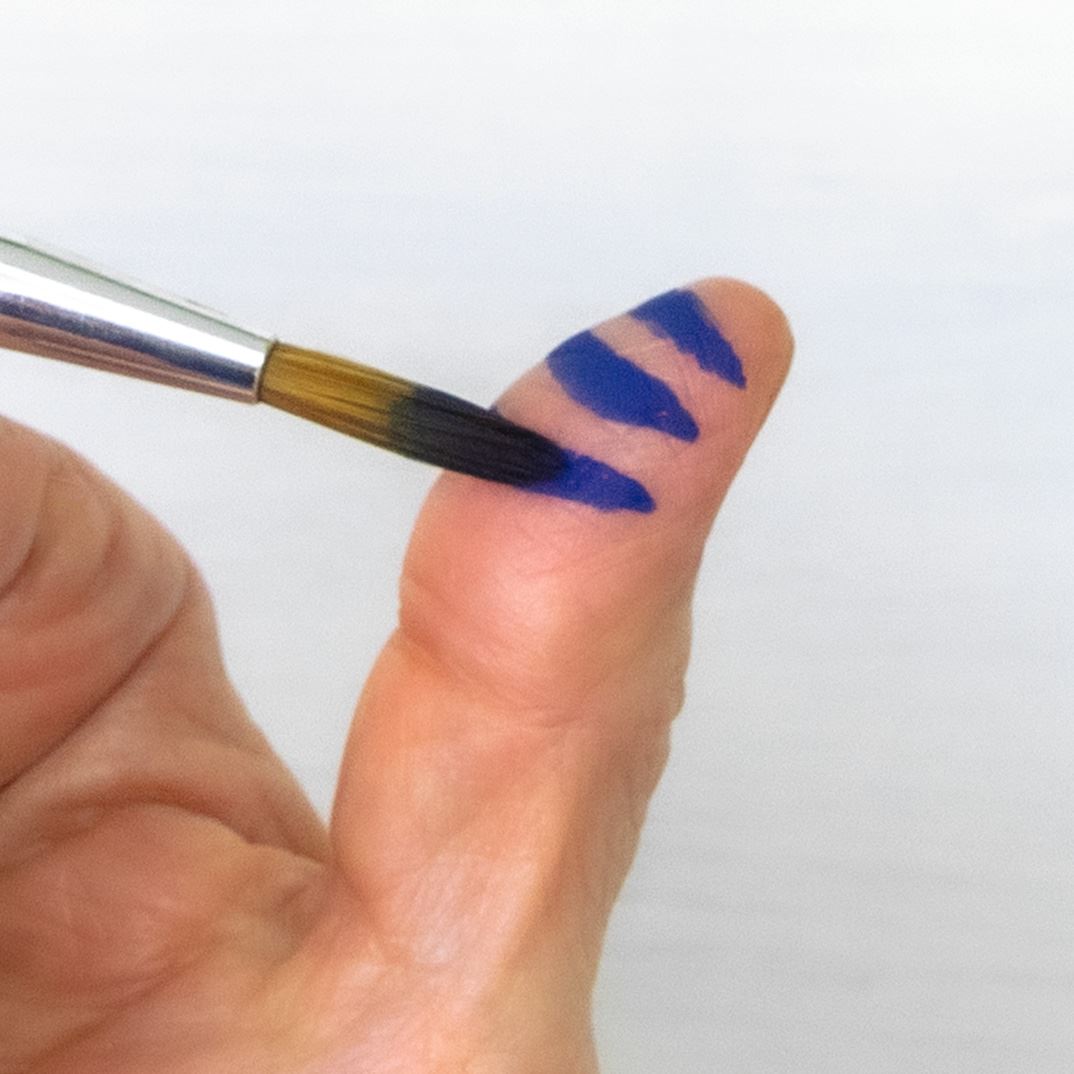
It’s also really easy to decorate a balloon with stripes. Paint your thumb with stripes and place the print on a dried, plain balloon. This works very well if you use a darker colour for the stripes.

Step 5
Use opaque white to make small dots on the balloon. To do this, dip the tip of your brush into opaque white directly from the tube and then place dots of different sizes on the balloon.
Step 6
Use a felt-tip pen to draw the bear’s face and the strings of the balloons.
Step 7
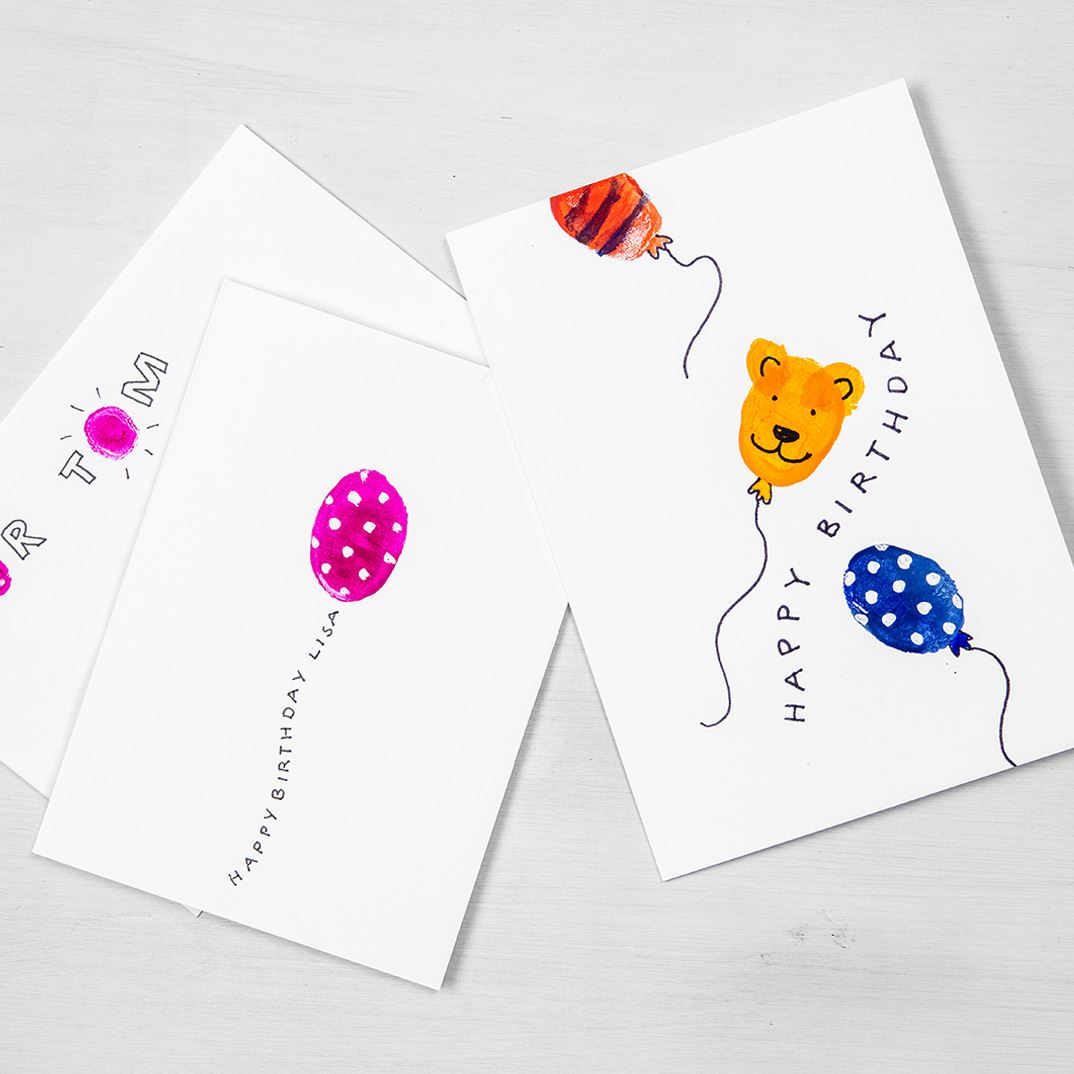
Write “Happy Birthday” in felt-tip pen and, if you like, the name of the person you are giving the card to – and your personal birthday card is ready!
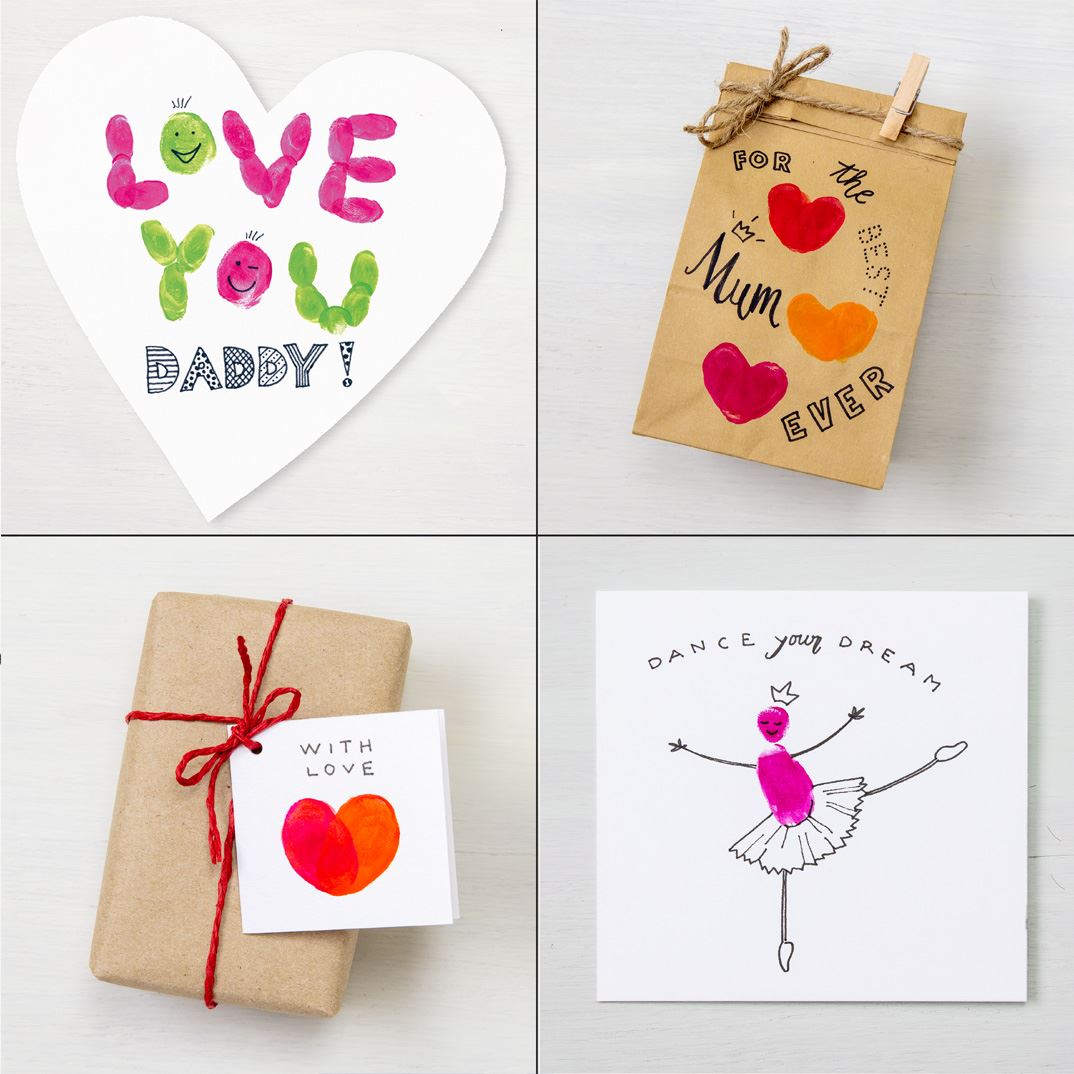
Mother’s Day / Father’s Day Card
There’s no quicker way to paint a heart! Place two fingerprints on top of each other at an angle of about 90° so that they form a heart. The prints overlap at the top of the heart. Use a felt-tip pen to write a message underneath and your mum or dad will be very touched!
By the way, this heart is also great for a “Save the date” card! Small bags made of natural paper can be decorated in no time at all: fill with sweets for mum or dad.
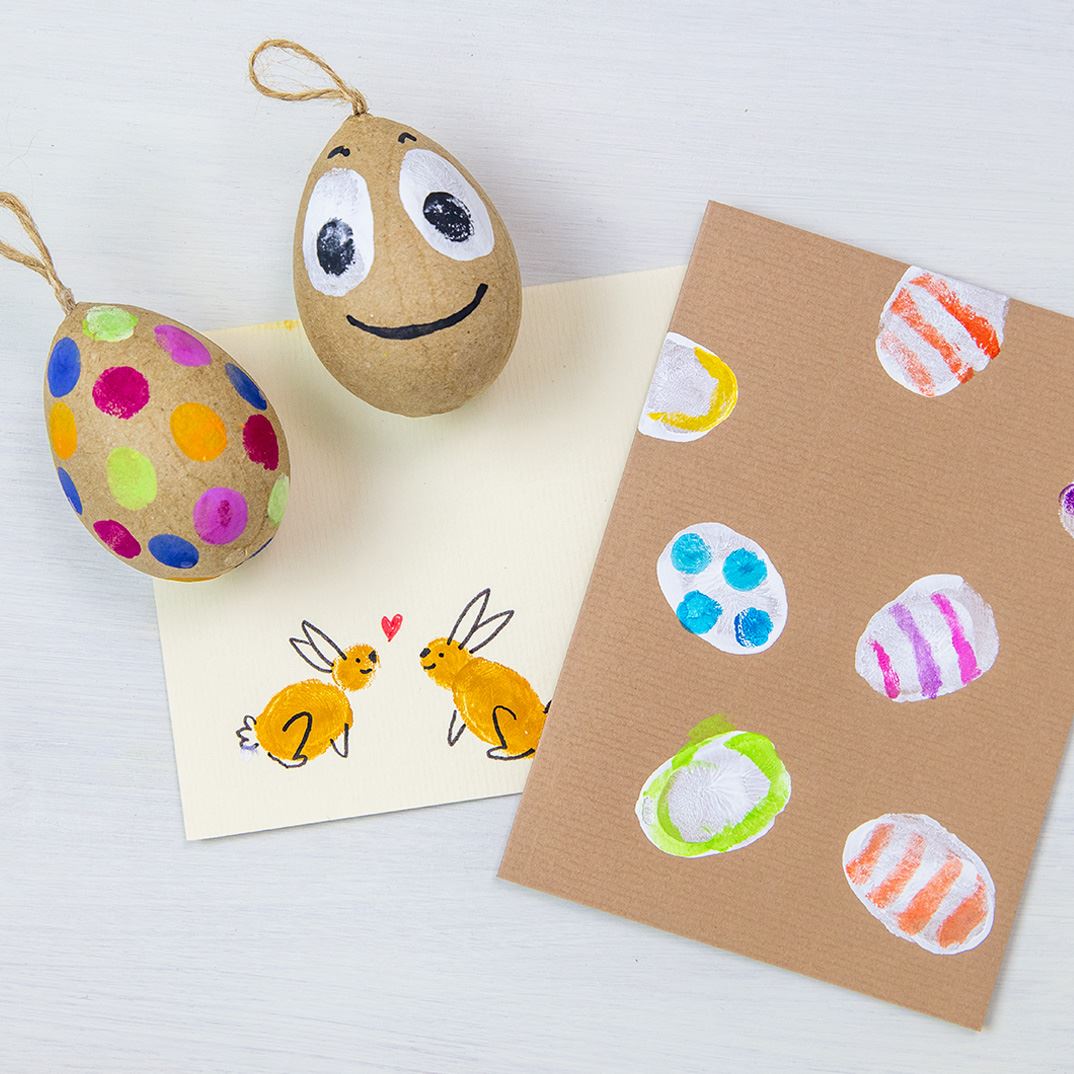
Easter Cards
What cute little Easter bunnies... and so easy to make! Use your middle or index finger to print the bunny’s head, and you can make the ears with your extended little finger. Paint a little more than the tip of your little finger with paint. This way your rabbits will have long ears. And if you like, you can use your thumb to create some beautifully patterned Easter eggs on the next card.
Have you ever decorated Easter eggs with your fingers? It’s really easy! Print dots on the papier-mâché egg with your little finger and let it dry – that’s it!
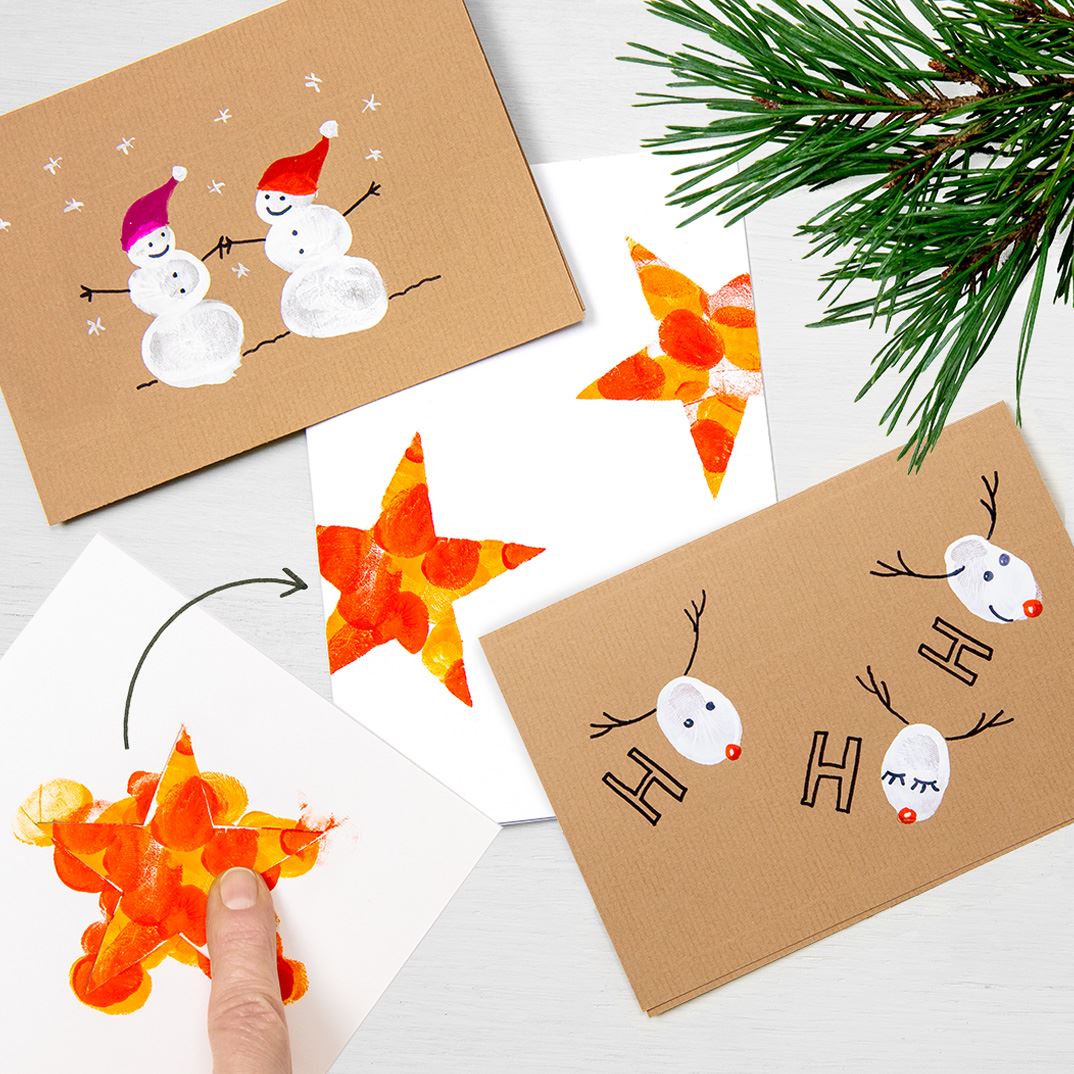
Christmas Cards
Everyone will love these home-made Christmas cards! To print the snowmen and reindeer heads, use natural coloured paper and the opaque white in the Connector paint box. Stir the opaque white with a brush and a little water until creamy in the lid of the paint box and then dip your finger in the paint.
Once dry, use a felt-tip pen to write the letters and draw the antlers of the reindeer and the arms and faces of the snowmen, and paint the reindeer noses and snowmen’s caps red.
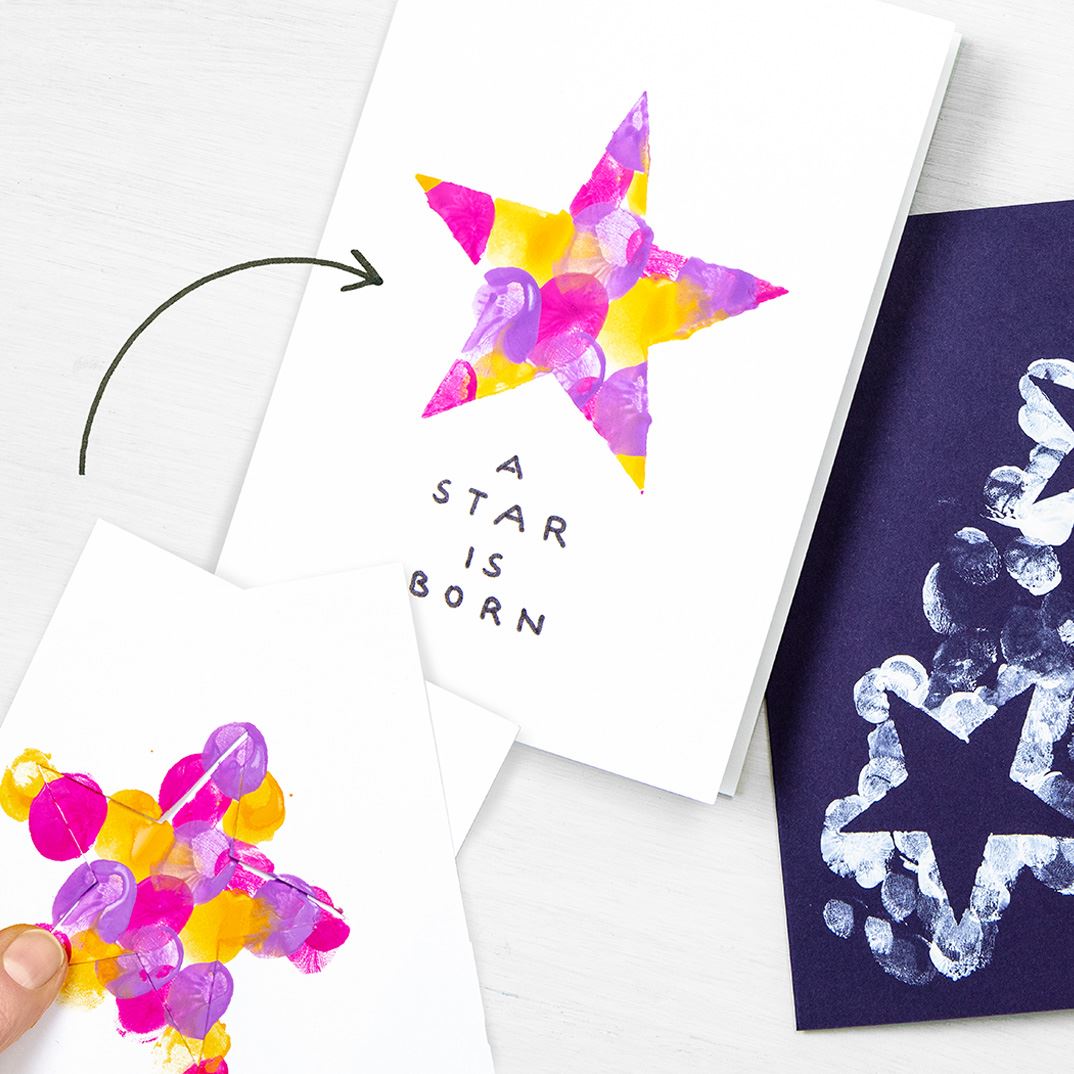
Stars
Fingerprint with stencils
Here we show you how to create a great effect with a very simple stencil. Cut out a star shape from a piece of cardboard, for example. Now place the stencil on your card or carefully tape it to the edge so that it doesn’t slip. Now fill the star shape with colourful fingerprints. It doesn’t matter which fingers you use. When the colours have dried, carefully remove the stencil.
You can also use the star you cut out for your stencil to print the fingerprints over. This way, the star remains unprinted and the surroundings are white or coloured.
So many possibilities
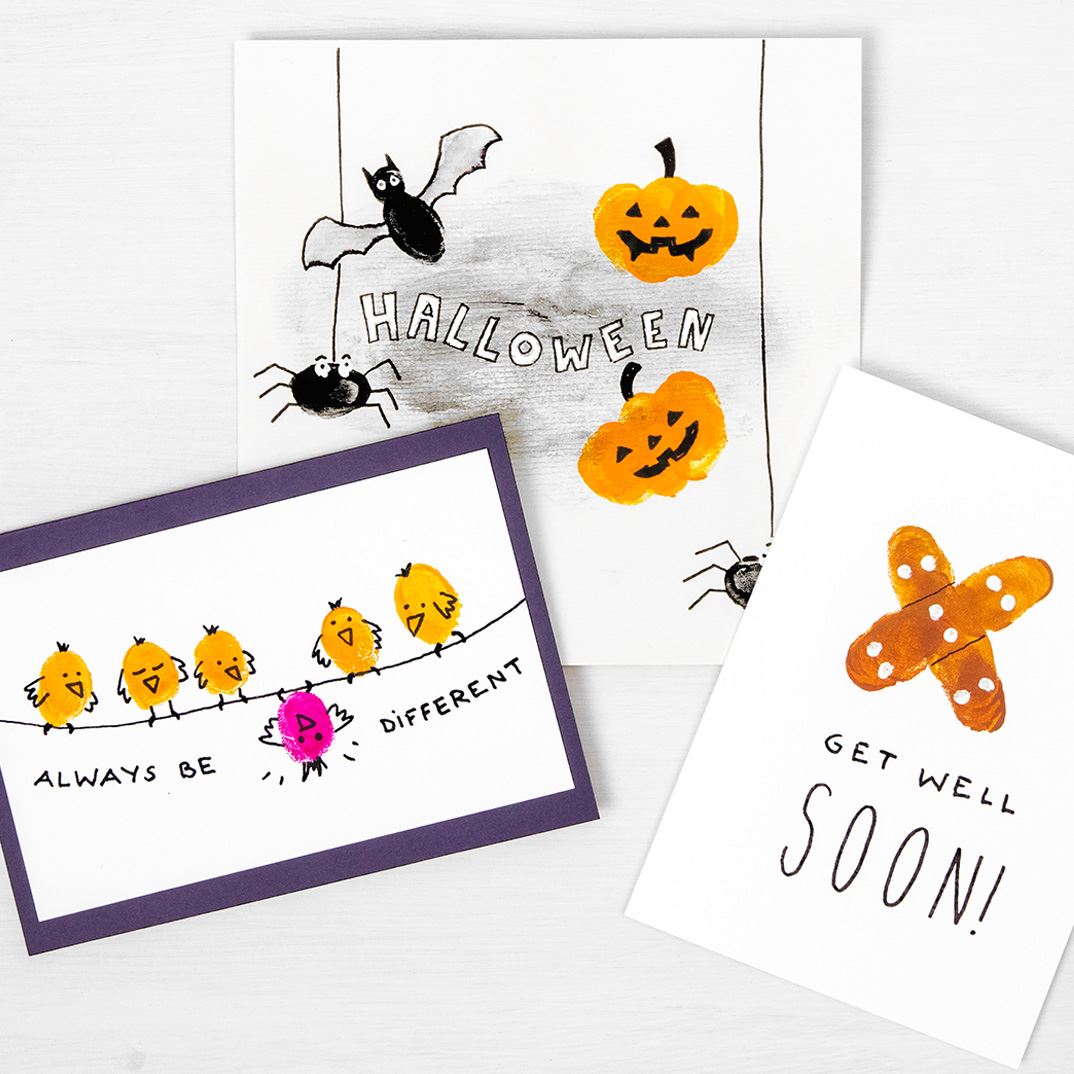
With the fingerprint method you can be really creative! Combine the fingerprints into funny animals, make an invitation to your Halloween party, send a get well card to a friend or create lovely messages for your grandparents.
Think of other fun themes – you’re bound to come up with lots of cool ideas!